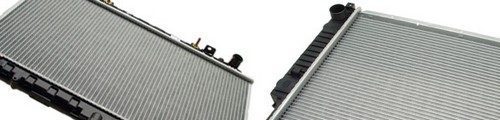
How to Install a Radiator in a Lexus SC 400
The Lexus SC 400 has a pressurized coolant system that basically utilizes a radiator which stabilizes its engine temperature. Though; this radiator can be damaged. A professional mechanic can replace it in a Lexus in about an hour. Let see how to install a radiator in a Lexus SC 400.
Things you’ll need:
You will probably require the following things:
- Socket set
- Screwdrivers
- Pliers
- Drain pan
Step 1:
Firstly disconnect the battery by simply turning the positive terminal bolt in an anticlockwise direction, and then put it on one side so that it could not the metal.
Step 2:
Next exhaust the radiator by just turning the radiator petcock in counterclockwise direction and let the coolant to drop into the drain pan. Here the petcock is actually a white otherwise black plastic bolt which you will see on the lower corner of the radiator. Put the cap of radiator to one side for relieving the negative pressure.
Step 3:
Now take out the upper plus lower coolant hoses by simply pinching the hose clamps. Sometimes clamps are made screw type and to remove them you have to turn their screws in counterclockwise direction. The hoses can easily be separated from the nipples, although they remain connected with the engine.
Step 4:
Next do away with the fan as well as fan shroud and for this reason turn the corner bolts in an anticlockwise direction, and after that unplug the wiring harness adapter by simply pulling it separately. Finally you will put the fan and fan shroud out of the engine compartment.
Step 5:
Now to remove the top radiator mount plate, twist the mount bolts in an anticlockwise direction, then tug the mount plate liberated.
Step 6:
Now pull the radiator toward the top of the engine compartment to remove it and put the radiator sideways.
Step 7:
Next put back the radiator with a new unit and for this slide it into the mount rails as well as into position, then attach the mount plate once again and make it secure with the bolts by turning them in clockwise direction.
Step 8:
Now it is time to reconnect the fan and fan shroud by just turning the corner bolts in clockwise direction, after that reattach the wiring harness connector by pushing the ends together until unless you listen to a click sound.
Step 9:
Now connect the coolant hoses onto the radiator nipples again, afterward make secure their hose clamps by nipping them collectively otherwise turn their screws in clockwise direction until unless snug.
Step 10:
Now make tight the radiator petcock, and fill the system with coolant if possible.
Step 11:
Connect the battery by again by turning the positive terminal bolt in clockwise direction until snug.
Step 12:
Next crank the motor and keep on to pouring coolant into the radiator until it is full. Put cap on the radiator, and keep on checking the coolant level in the reservoir tank.


