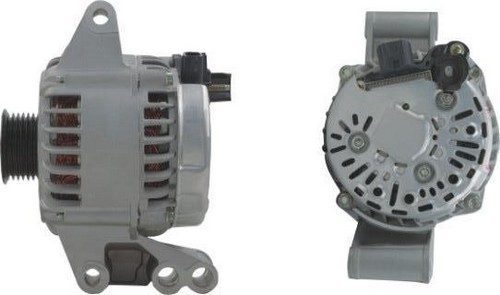
Ford Alternator Repair
Thu, 09/26/2013 - 17:40
Always carry out a visual check ahead of troubleshooting your Ford alternator. In this way verify that there is no visible damage, for instance check the drive belt to see if it is tight enough plus the electrical connections are in fine condition and don’t have any dust and corrosion. After that disband the alternator, put down each part orderly on a workbench and make them clean through an electrical contact cleaner. Thoroughly check each part for visual damage, once you have done with it you can move forward to next tests. This article entails Ford alternator repair procedures.
Rotor Test:
You can begin with the rotor and use an ohmmeter to test for continuity between the two slip rings installed on the center shaft. This meter should record continuity between the two rings; if it is not the case, simply replace the rotor.
Again test for continuity between each rotor slip ring and the rotor shaft. Now this meter should not record any continuity; if it isn’t, replace the rotor. If the rotor succeeded in these tests, next polish the two slip rings by means of 400-grit sandpaper.
 Stator Test:
Examine the three stator electrical terminals. Use your ohmmeter to check for continuity between the center terminal and the one on the left. Afterward check for continuity between the center and right terminal. Your meter is supposed to record continuity in each test; if it doesn’t, replace the stator. At this time check for continuity again between each terminal and the outer stator ring. At the moment your meter must not record any continuity; if it does, replace the stator.
Diodes Test:
Next test the resistance of each diode terminal (that is usually mounted in the rear case) and also the case next overturn the ohmmeter leads and go over the test. You must have a high and a low reading for this test; if you see the two ohmmeter readings excessively close to each other on any one of the diodes, simply replace that diode.
Diode Trio Test:
Some alternators come with a diode trio, in this case test the resistance between the side terminal and each one of the three terminals beside each other. Do again the test reversing the ohmmeter leads. Now consequently one of the readings must be higher than the other; if not, replace the diode trio.
Rectifier Bridge Test:
Check the rectifier bridge, if your alternator is equipped with it. The fins found on one side of the rectifier are made insulated, whereas the ones on other side are not insulated. Test the resistance of the rectifier by prying one side of the rectifier as well as each one of the three clips found in the middle of the bridge. Now go over the same test reversing the ohmmeter probes. As a result, one of the readings is supposed to be higher as compare to the other; otherwise, replace the rectifier bridge.
At this moment, do the same test again, but this time between the other side of the bridge plus the three clips. One of the readings must be higher than the other; otherwise, replace the rectifier bridge.
Stator Test:
Examine the three stator electrical terminals. Use your ohmmeter to check for continuity between the center terminal and the one on the left. Afterward check for continuity between the center and right terminal. Your meter is supposed to record continuity in each test; if it doesn’t, replace the stator. At this time check for continuity again between each terminal and the outer stator ring. At the moment your meter must not record any continuity; if it does, replace the stator.
Diodes Test:
Next test the resistance of each diode terminal (that is usually mounted in the rear case) and also the case next overturn the ohmmeter leads and go over the test. You must have a high and a low reading for this test; if you see the two ohmmeter readings excessively close to each other on any one of the diodes, simply replace that diode.
Diode Trio Test:
Some alternators come with a diode trio, in this case test the resistance between the side terminal and each one of the three terminals beside each other. Do again the test reversing the ohmmeter leads. Now consequently one of the readings must be higher than the other; if not, replace the diode trio.
Rectifier Bridge Test:
Check the rectifier bridge, if your alternator is equipped with it. The fins found on one side of the rectifier are made insulated, whereas the ones on other side are not insulated. Test the resistance of the rectifier by prying one side of the rectifier as well as each one of the three clips found in the middle of the bridge. Now go over the same test reversing the ohmmeter probes. As a result, one of the readings is supposed to be higher as compare to the other; otherwise, replace the rectifier bridge.
At this moment, do the same test again, but this time between the other side of the bridge plus the three clips. One of the readings must be higher than the other; otherwise, replace the rectifier bridge.[{"target_id":"256824","alt":null,"title":null,"width":"500","height":"295","url":"\/sites\/default\/files\/articles-images\/b7\/Ford-Alternator-8199258-3546879-9095968.jpg"},{"target_id":"256825","alt":null,"title":null,"width":"999","height":"667","url":"\/sites\/default\/files\/articles-images\/39\/The_Top__Signs_Your_Ford_May_Need_an_Alternator_Repair_637623716012953111.png"}]


