How to Install a Brake Line Lock
In all vehicles a brake line lock is normally a front brake valve that will get close to brake line when set off by the driver. The system brakes the front wheels whereas the rear wheels carry on to turn. A line lock is mostly important in racing conditions that put off the car from rolling advance at the start. Normally this line lock doesn’t have any bearing, because the system brakes tend to work normally when it is not taken on. In this article, we discover how to install a brake line lock.
Things you’ll need:
The required tools to install a brake line lock include:
- Brake line lock kit
- Bushing adapter
- Mechanic tools
- Brake Line Fittings
- 22 gauge wire
Installing the Line Lock
Step 1:
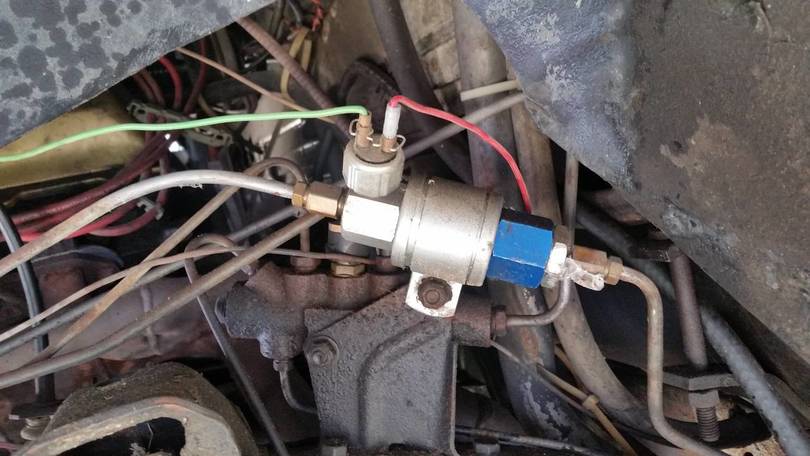
Firstly start with discovering a site to mount that solenoid that is close to the fuse box between the master brake cylinder and front wheel cylinders. Keep in mind that the solenoid must be positioned in a location offering least bending of the lines. Avoid mounting the unit at this time.
Step 2:
Use the proper-sized bushing adapter to join with the solenoid two-threaded port. Usually two sizes are available there i.e. 1/8-inch to 1/4-inch inverted flair or else 1/8-inch to 3/16-inch inverted flair.
Step 3:
Next attach the adapter with the solenoid ports. After that, mount the solenoid to the suitable location that was found in step 1.
Step 4:
Now tie the brake lines to the adapter on the solenoid while making use of brake line fittings to put off fluid leaking. Verify that the master brake cylinder is properly attached with the port named as master.
Step 5:
Utilize a barrel connector to attach the solenoid wires. You will find there two wires i.e. one is ground wire and second one is hot wire. Verify that the black ground wire is properly attached to a clean contact area. Next connect the fuse holder between the solenoid plus 12-volt power source.
Step 6:
Disengage the battery, afterward the wire and put the micro-switch on the dashboard together with a 22-gauge wire. Next mount the switch in a region that is quite easy to get to. You fill see there two wires; where one of them connects to the solenoid and other one to the positive on the 12-volt power system. Make all loose wires secure to avoid any damage. Now reconnect the battery.
Step 7:
Drain the brake system to let go any air build up. Fill the brake system with fluid once again
Step 8:
Finally test the system with wheels off the ground. If requires them make appropriate adjustments.
Tips & Warnings:
- Always Use DOT-approved brake lines as well as brake fluid.
- Avoid driving your car exclusive of testing the brake system also don’t mount the switch without verifying the parts at the back the area being drilled to avoid any damage.